Showing posts with label vegetarian. Show all posts

Christmas Tree Cheesy Spinach Stuffed Breadsticks


 Happy holidays everyone. This year for the holidays I decided to try my hand at making one of those fancy stuffed bread stick Christmas tree appetizers. I'm really glad I gave this recipe a shot because it was not only simple to make, but it was super festive.


The most difficult part was getting the pizza dough to cooperate and not stretch too much while I laid it over the top. Other than that, it was as simple as mixing everything together and baking it. It was a really good, too. It was the perfect appetizer to make while we watched holiday movies.

Recipe from It's Always Autumn


  • 12 oz. package of frozen spinach, thawed and squeezed dry
  • 6 oz cream cheese
  • 2 garlic cloves, minced
  • 1/2 tsp. onion powder
  • 1/4 tsp. pepper
  • 1/4 tsp. chili powder
  • 1/2 c. parmesan cheese, grated
  • 1 c. colby jack cheese, shredded
  • 1 tube of refrigerated pizza dough

  1. Preheat oven to 400* 
  2. In a bowl mix together all package of frozen spinach, cream cheese, garlic, onion powder, pepper, chili powder, parmesan, and half of the colby jack cheese.
  3. To shape the tree, cut a triangle out of the center of the pizza dough (from one end to the other). Use the outer triangle pieces to create one large triangle that should match the size of the original triangle you cut out. I put the base of my tree right on parchment paper for baking. You will want to assemble this right on your baking dish.
  4. Place the filling on top of one of the large triangles. Sprinkle the remaining colby cheese on top. Place the second triangle on top. 
  5. Slice the branches of the tree, leaving a small section of the middle intact to hold the tree shape. Twist ends to get the spiraled look.
  6. Bake for 22 minutes or until golden brown on top and cooked underneath. Serve warm.

This video shows how to make the tree shape in the dough. 

Vegetable Pot Pie


One thing I love about the colder weather is heating the house up with the smell of a delicious casserole. I love pot pie and have tried a few recipes over the years. However, I realized that I've never tried a vegetable only pot pie. Since I already had everything on hand, I decided to give this recipe a try.


Every week I sit down and go through my recipes and my Pinterest board to come up with all the dinners I plan to make for that week. That way I know what I need to get from the grocery story. This was a recipe that I didn't have to buy anything for because I already had everything on hand. I even had some white wine already opened. Well, technically it's a boxed wine... so I always have some white wine "opened". By the way, if you like white wine, I recommend the Black Box Chardonnay. That's what I used for this dish and it's probably my favorite boxed white wine. It's got a light, crisp, and subtle fruity flavor that you'd expect from a white wine but then it ends on a creamy note. So, yeah, that's my wine of choice for this dish but any white wine like chardonnay or sauvignon blanc would work.


recipe adapted from Life Currents

  • 3 medium Yukon gold potatoes
  • 3 tablespoons olive oil
  • 1 large onion finely chopped
  • 1 1/2 cup carrots, peeled and sliced ¼-inch thick
  • 2 tablespoons unsalted butter or margarine
  • ½ cup unbleached all-purpose flour
  • 1 ½ cups milk
  • 2 cups vegetable broth
  • 1 ½ teaspoons kosher salt
  • ½ teaspoon freshly ground black pepper
  • 1 teaspoon dried thyme
  • ¼ cup white wine
  • 3/4 cup frozen peas thawed
  • 1 sheet puff pastry thawed and unfolded


  1. Preheat the oven to 400° F.
  2. Pierce the potatoes several times with a fork or knife, and microwave until cooked through, about 5-10 minutes, depending on the size of the potatoes and the power of the microwave. Allow potatoes to cool slightly so that you can handle them, and chop into ½-inch to 1-inch dice. Transfer cubed potatoes to a large bowl, and set aside.
  3. Heat a large pot or Dutch oven over medium-high heat, and add 1 tablespoon oil. Once the oil is hot, sauté the onions until starting to brown and caramelize, about 15-20 minutes. Add the carrots to the onions, and continue to cook, and until tender, about 5-7 minutes. Transfer cooked vegetables to the large bowl with the potatoes, and set aside.
  4. Reduce the heat to medium, and add the butter and 2 tablespoons oil to the same pot. When the butter has melted, stir in the flour and cook, stirring constantly for 1 minute. Slowly and gradually stir the milk, broth, thyme, salt, and pepper into the flour mixture. Continue to stir constantly as the sauce thickens. Stir in the white wine, and cook for an additional minute.
  5. Turn the heat off, and stir the cooked vegetables and the peas into the sauce, until well combined. Taste for salt and pepper.
  6. Pour the filling into a 13x9-inch baking dish, and bake in 400° F oven for 18 minutes. Remove the dish from the oven (keeping the oven on and close the door behind you), and place the puff pastry over the top of the filling, gently folding some of the pasty over the sides of the pan. Using a sharp knife, cut 3 slits in the top of the puff pasty to allow steam to escape. Return the baking dish to the oven and bake for an additional 10 minutes, until the puff pastry is golden brown and the filling is bubbly. Allow to cool for 5-10 minutes before serving.

Cranberry Jalapeno Dip


I'm not a huge peppermint person. However, during the holidays, I LOVE cranberries. The fresh stuff, not the sugary dehydrated craisins you see in stores year round. My go-to is usually Upside Down Cranberry Cake but this year I wanted to do something different. We love eating dip on the weekends and this was a great way to incorporate that with one of my favorite holiday ingredients.


One thing that I loved about this recipe was how easy it was to throw together. I thought I would have to cook the cranberries, but you don't. Although, you do want to make this the night before since it needs time to allow the flavors to meld together. One thing I do recommend is right before you go to put the cranberry mix on the cream cheese, slice up a little more green onion and mix it in. The green onion loses its vibrant color as it sits overnight and I really wanted a red and green color to the dip when I served it. I served this dip with Triscuits, but sliced bread or even water crackers would work with this. I just always have Triscuits on hand. One thing I changed from the original recipe was I added plain yogurt to the cream cheese. I always add fat-free plain yogurt to my cream cheese when I use it as a dip. It not only adds more volume without altering the taste, but it also adds a creaminess to the cream cheese and makes it smoother and less dense.

recipe adapted from Mel's Kitchen Cafe

  • 12 ounces fresh cranberries
  • 4-5 green onions, chopped
  • 1/4 cup chopped fresh cilantro
  • 1 jalapeno pepper, seeded and finely diced
  • 1/2 cup sugar
  • 1/2 teaspoon cumin
  • 2 tablespoons fresh lemon juice (from about 1 large lemon)
  • 2 (8 ounces) packages cream cheese, softened
  • 1/2 cup plain yogurt

  1. Chop cranberries until it's in small chunks and set aside in a bowl. You can also put the cranberries in a food processor or blender until coarsely chopped if you don't want to chop by hand. Add the green onions, cilantro, jalapeno, sugar, cumin, and lemon juice to the cranberries and mix until the ingredients are well combined. Transfer the mixture to a covered bowl or tupperware and refrigerate for at least 4 hours (I let mine sit overnight).
  2. When ready to serve, mix the yogurt and cream cheese together (I used my handheld mixture for this) and spread it in an even layer on a serving plate or 9-inch pie dish. Top with the cranberry-jalapeno mixture, spreading evenly over the top of the cream cheese.
  3. Refrigerate for up to an hour before serving. Serve with crackers or sliced bread.

Biscuits and Lentil Gravy

One thing that I love and miss about eating meat are biscuits and sausage gravy. That was something that I could eat for every meal of the day and have no regrets. Actually, when the Mister and I were traveling across the country, every hotel we stopped at had biscuits and gravy as one of their complementary breakfast items. I won't lie to you guys, I may or may not have chosen the hotels we stopped at for the night based on their breakfast options.


So, I was really excited when I saw a recipe for this in my copy of Thug Kitchen, a vegan cookbook. I've tried a few recipes from this book and honestly, they've not been that great. There's always something that doesn't work out or I end up feeling like it needs more or different spices from what the recipe calls for. Basically, the recipes end up being a bit bland. However, that didn't deter me from trying this recipe. Of course, the one thing that did not work for me were the vegan biscuits. They were awful. They were so hard and tough. No amount of gravy made them palatable. I would up throwing them out to the birds to eat. Thankfully, the gravy turned out amazing. So, after we choked down the first round, I went out and bought a tube of buttermilk biscuits to use for the leftovers. Once I made the change, these biscuits and gravy were golden.

  • 1 ½ cups of green or brown lentils
  • 5 cups of water
  • salt
  • ½ yellow onion, diced
  • 1 teaspoon olive oil
  • 1 teaspoon dried thyme
  • 2 cloves of garlic, minced
  • black pepper
  • 1 tablespoon flour
  • 1 cup of vegetable broth
  • 1 teaspoon soy sauce
  • 1 teaspoon paprika
  • ½ teaspoon red wine vinegar
  •  1 tube of biscuit dough or one batch of homemade biscuits

  1. Bake biscuits according to package.
  2. Bring the lentils, water, and a little bit of salt to a boil in a small saucepan. Simmer for 40 minutes to cook the lentils until they are falling apart.
  3. In a small skillet, heat up the olive oil over medium heat and sauté the onion until it starts to brown (3 minutes), add the thyme, garlic, and some black pepper and cook for another 30 seconds. Take off the heat.
  4. When the lentils are cooked, drain the excess water and put the lentils back into the pot.
  5. In a small bowl, mix together the flour and the broth. Add the broth mix into the lentils along with the onion, soy sauce, paprika, and vinegar.
  6. Use an immersion blender or a normal blender to blend the gravy to a smooth consistency.
  7. Heat the gravy up again and simmer in the saucepan to thicken, 2-3 minutes.

Pumpkin Curry Macaroni and Cheese


It's finally FINALLY cooled back down here in SoCal. While everyone back home was talking about rainy days and drinking hot cider, I was over here on the west coast dying from the insane dry heat we were getting. Nothing says fall more than wearing summer dresses and drinking iced coffee.  So, needless to say, I was really happy when the temperature started to dip into the 70's and immediately started pulling out my cans of pumpkin.


While most people view the fall as time to break out pumpkin spice things, I always look to the pumpkin itself. I love finding recipes that use pumpkin puree as part of the ingredients in a savory dish. This recipe was one that I was really excited to try because the Mister loved mac and cheese, and I'm a huge fan of curry dishes. So, the fact that it combined the two and incorporated pumpkin into the mix was a complete win.

recipe adapted from Flavor Mosaic


  • 2 cups of elbow macaroni
  • 2 Tablespoons butter or margarine
  • 3 Tablespoons all-purpose flour
  • salt and pepper to taste
  • 2 cups Half and Half
  • 1 ½ teaspoons curry powder
  • 1 cup pumpkin puree
  • 2 cups shredded Mozzarella cheese, divided
  • ½ cup panko bread crumbs

  1. Preheat oven to 350 degrees F. Cook the pasta to al dente in a large pot following package directions. Drain cooked pasta, then return to pot.
  2. In a large skillet or saucepan, melt butter over medium heat. Stir in flour, salt, and pepper. Pour in Half and half. Cook and stir over medium heat until slightly thickened and bubbly. Stir in curry powder. Stir in pumpkin and 1 cup mozzarella until cheese is melted. Stir cheese sauce into pasta to coat. Transfer the macaroni and cheese to a2-quart rectangular baking dish that's been sprayed with cooking spray.
  3. Sprinkle the remaining mozzarella over the pasta. Sprinkle the bread crumbs on top of the cheese. Spray with cooking spray.
  4. Bake, uncovered, for 30 minutes or until bubbly and top is golden. Let stand 10 minutes before serving.

Hawaiian Sloppy Joes


I love sloppy joes. It's one of my childhood favorites that has become a staple in this house as an adult. They are so easy to make, you can customize them with ingredients you like, and you can tweak the sauce to get a completely different tasting dish every time. Plus, they pair really well with tater tots or cauliflower tots.


One of my go-to dishes is my unsloppy joes. I've been making them for years and I love them, but I wanted to try something a little different. When I came across these Hawaiian sloppy joes, I knew I had found a winner.  I loved the sweetness that the pineapple adds to the sauce. I couldn't find any fresh pineapple at my grocery store so I bought a can of sliced pineapple instead. I will go ahead and say that fresh is definitely better in this but canned works in a pinch. It's not that the canned pineapple was bad but I think the fresh would have not only held up it's shape better but given the dish a more pineapple flavor. 
Recipe adapted from Vodka & Biscuits


  • olive oil as needed
  • 1 yellow onion, small dice
  • 1 green bell pepper, small dice
  • 2 cloves garlic, minced
  • 1 cup button mushrooms, finely chopped in food processor
  • 1/2 teaspoon salt
  • 1/4 teaspoon black pepper
  • pinch red pepper flakes
  • 1 cup cooked lentils
  • 1 cup diced pineapple
  • 1/4 cup low sodium soy sauce
  • 1/4 cup light brown sugar
  • 1 tablespoon apple cider vinegar
  • 14 oz. can tomato sauce
  • 1 pack hamburger rolls

  1. In a large pot, heat 2 tablespoons olive oil over medium high heat. Add the onions and peppers and cook until onions are translucent and peppers are soft, about 4-5 minutes.
  2. Add the garlic and cook until fragrant, about 45 seconds.
  3. Add the mushrooms and continue to cook until mushrooms become soft, another 5-6 minutes. Season with salt, pepper, and red pepper flakes. Cook an additional minute or two to let the flavors mingle.
  4. Stir in the lentils, pineapple, soy sauce, brown sugar. Mix until incorporated. Add the tomato sauce and vinegar and mix. Reduce the heat to medium and simmer uncovered for 20 minutes.
  5. Taste and adjust seasoning as needed. Allow to cool 10 minutes before serving on rolls.


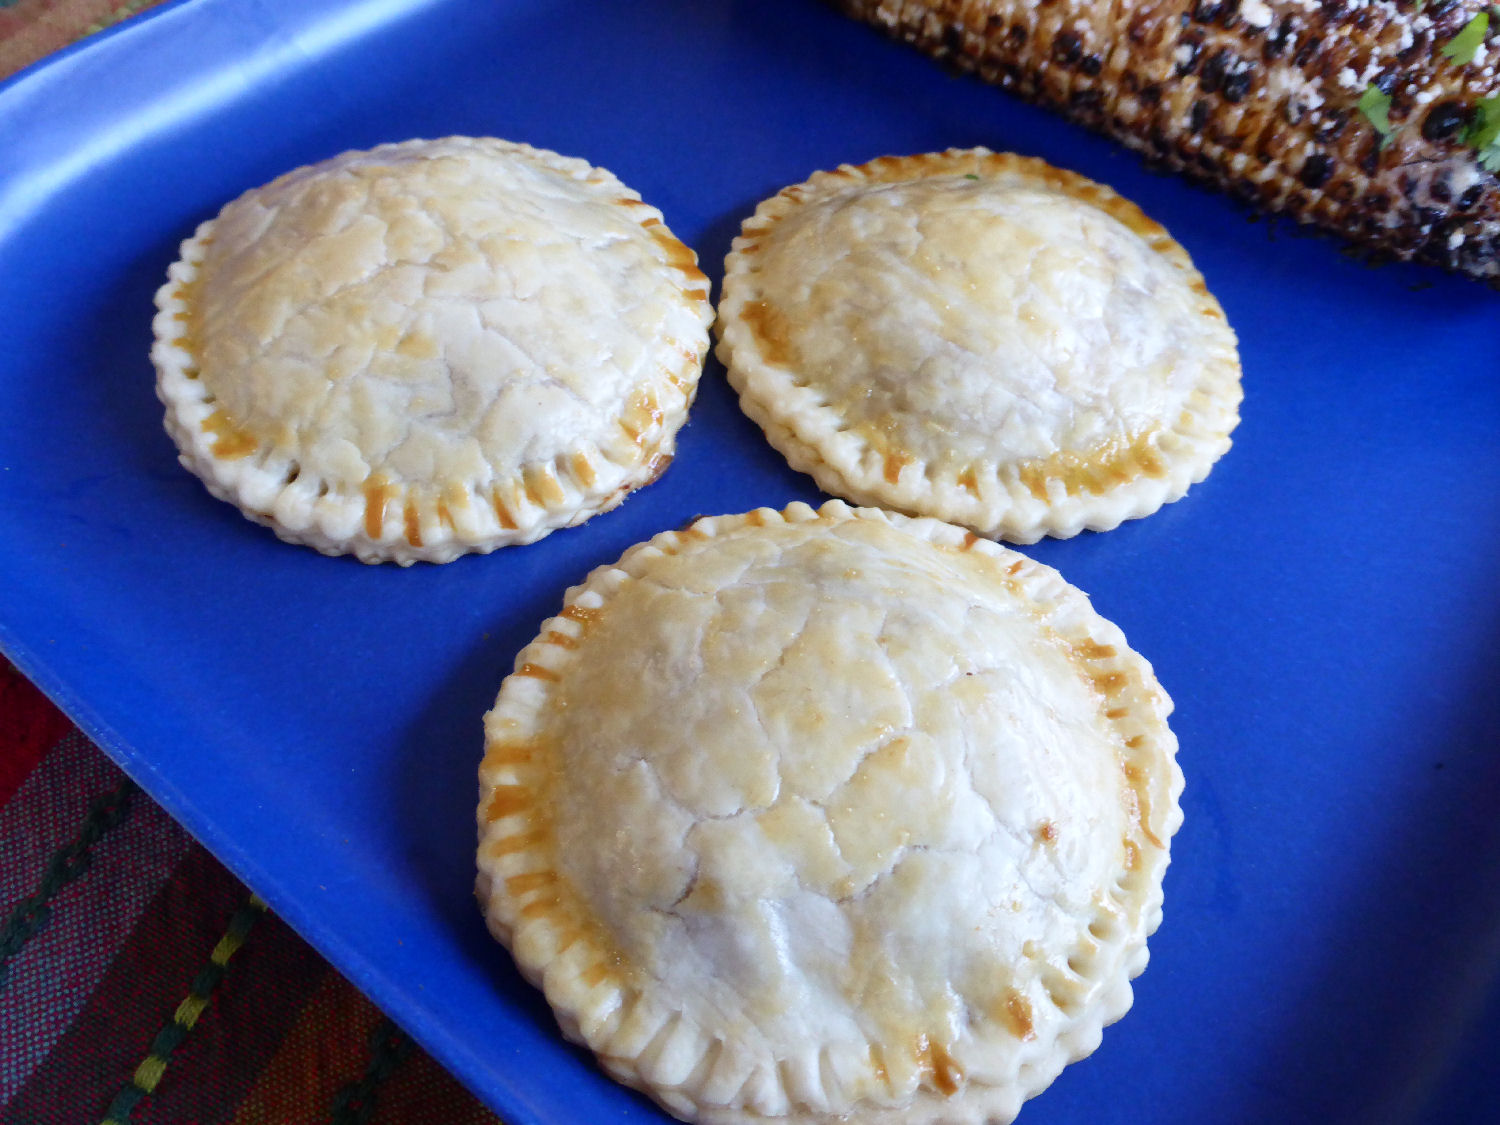
Soyrizo Mushroom Hand Pies


I love empanadas. I used to love when my cousin would make them when I'd come over for a visit. I think that was one of the few things I actually cooked as a teenager. Once I got married and moved away, I continued to make them. However, now that I've given up meat, I haven't been able to find a recipe that I like as much as the original one I used to make as a teen... until now.


One thing I ate before I had even given up meat was soyrizo. I love chorizo with all of it's flavors and spiciness but I have never been a huge fan of sausage, hot dogs, or any other sort of processed meat that leaves you not wanting to question what it's made out of. Soyrizo has all the same flavors as chorizo without any of the gross, questionable ingredients.


These hand pies are super easy to make. All the ingredients are readily available at pretty much all super markets and it's really quick to throw together. The only item that I wasn't sure I'd find was the Cotija cheese. For some reason my grocery story put it over by the ricotta cheese. If you can't find Cotija cheese, you can substitute it with either Parmesan or feta cheese. Cotija tasted like a combination of the two, so either of those should work if you can't find it. You can make the filling ahead of time to shave off half the prep time for these or you can make the hand pies ahead of time and store them in your refrigerator on a baking sheet until you are ready to pop them in the oven. I've done both and they turned out great. These are definitely going into my "keep" pile of recipes.


Recipe adapted from Comowater


  • 1 package Soyrizo (vegetarian chorizo)
  • 1/4 yellow onion, diced 
  • 3 1/2 cups sliced button mushrooms 
  • 3 Tbsp. olive oil 
  • salt 
  • pepper 
  • 1/2 cup cotija cheese
  •  4 roll out pie crusts 
  • 1 egg, beaten 
  • 1 tsp. milk 

  1. Preheat oven to 375° F.
  2. Add 2 tablespoons of olive oil to a saute pan and heat over medium heat. Cook soyrizo until slightly crunchy (about 7-10 minutes), stirring occasionally. Set aside and let cool completely.
  3. Add 1 tablespoon of olive oil to the same sauté pan and heat over medium. Add onions. Saute 2 minutes. Add mushrooms. Saute over medium until onions and mushrooms are soft; about 5 minutes. Add a small pinch of salt and a few grinds black pepper.
  4. Mix the cooled soyrizo with the onion/mushroom mixture and let cool completely before beginning hand pie assembly.
  5. Lightly spray cookie sheet with cooking spray. Lightly flour counter. Roll out pie dough to 1/4 inch thick. Cut out circles of desired size. Add filling to center of dough circle, leaving a 1/4-1/2 inch border around the edge of the dough. Wet the edge of the dough slightly with water. Top with second dough round and seal the hand pies closed. Lightly beat egg with milk to create an egg wash. Brush the top of the hand pies with egg wash. Add the hand pies to the cookie sheet. Bake approx. 15 minutes, or until golden brown. Let cool and enjoy!

Slow-Cooker Black Bean Quinoa Stuffed Peppers


I don't know about you but when it gets hot here, the last thing I want to do is spend time in the kitchen. Especially when we're going through a heatwave and I don't have air conditioning to cool down the house. When it comes to moments like these I usually do one of two things, cook on the grill or cook with my slow-cooker. Now I know what you're thinking, running a slow-cooker heats up the house, too. You would be correct. However, I put the slow-cooker in our garage or out on the back patio where it won't heat up the house. It's a little abnormal but I end up with a delicious home-cooked meal that's full of flavor and I didn't have to heat up my whole house to make it. ;)


I'm a big fan of stuffed peppers. There's so many different ways you can make them. I've had the traditional version, enchilada version, and even a lasagna version. All were very delicious and filling. However, one thing they all had in common was that I would boil the peppers before assembling them and then bake them in the over to finish them off. Neither of which is happening when it's in the 90's. This recipe requires neither of those things since it's all made in the slow-cooker. However, because I had to make the quinoa, I wound up making it the night before after it had cooled off some, and stored it in the refrigerator until the next morning.

recipe adapted from Pinch of Yum


  • 6 bell peppers
  • 1 cup uncooked quinoa, rinsed
  • 2 (14 ounce) can black beans, rinsed and drained
  • 1½ cups red enchilada sauce
  • 1 teaspoon cumin
  • 1 teaspoon chili powder
  • 1 teaspoon onion powder
  • ½ teaspoon garlic salt
  • 1½ cups shredded cheddar, colby jack, or pepper jack cheese
  • cilantro, guacamole, salsa, avocado, sour cream, for toppings

  1. Cut the tops off of the peppers and scrape out the ribs and seeds.
  2. In a large bowl, combine the quinoa, beans, enchilada sauce, spices, and 1 cup of the cheese. Fill each pepper with the quinoa mixture.
  3. Pour ½ cup water into the bottom of a slow-cooker. Place the peppers in the slow-cooker so they're sitting in the water. Cover and cook on low for 6 hours or high for 3 hours. Remove lid, distribute remaining cheese over the tops of the peppers, and cover again for a few minutes to melt the cheese.
  4. Top the stuffed pepper with your choosing. 

Baked Lentil Ziti


I'm always on the look-out for recipes that take a well-loved dish with meat, and turn it into a meatless version. I'm also a huge lover of beans. Even when meat-free dishes don't call for beans, I'm usually adding them in anyways. So I was really excited when I saw this recipe that took one of my favorite family dishes, baked ziti, and not only omitted the ground meat, but also added in lentils. It's been a very long time since I've had baked ziti but that's all about to change with this recipe. I thought it was delicious and I will definitely be holding onto this recipe for later.


This is a super easy dish to make. I feel like I say that all the time but I am a lover of easy recipes. You can cook the lentils and pasta ahead of time and set them in the refrigerator until you're ready to make the dish. You could even make the whole thing, put it in the casserole dish and store it in the refrigerator until you are ready to eat, and then just pop it into the oven. Either way, it's as easy as cooking pasta and lentils, mixing everything together in the casserole dish, and baking it until it's bubbly. I loved the taste of this and definitely used a little bit more sauce than the recipe called for but that's because I don't like dry pasta.


 There are a couple things I want to point out that I did differently from the recipe. I used gluten-free pasta. I've tried using gluten-free pastas in the past for various dishes and have found that they don't always hold up, especially when it's a one-pot recipe where the pasta cooks in the liquid with everything else. However, the pasta worked great in this dish, but I did under-cook it by about 2 minutes, so it still had some bite to it before I added it into the casserole dish to bake. So, if you plan to use gluten-free pasta just be sure to under-cook it a bit so that it holds it's shape and doesn't turn to mush while the casserole bakes. I also didn't put the cheese on the casserole for the initial baking process. Mainly because the casserole came right up to the top and if I put foil on it, the cheese would have stuck... and I didn't feel like rummaging around my cabinet looking for toothpicks. So, I put the foil on the casserole without the cheese for the first half of baking and then when it was time to crank the heat and remove the foil, I put the cheese on and baked it until it was bubbly.  Like I said before, I really enjoyed this dish and it will be a winter staple in our house from here on out.


recipe adapted from Cookie and Kate


Lentils:
  • 1 tablespoon olive oil
  • 1 onion, chopped
  • ¼ teaspoon salt
  • 2 cloves garlic,  minced
  • 1¼ cups regular brown lentils, picked over for debris and rinsed
  • 3 cups water
Pasta and everything else
  • 12 ounces ziti, rigatoni or penne pasta
  • 2 cups grated part-skim mozzarella cheese
  • Salt and freshly ground black pepper, to taste
  • Pinch of red pepper flakes (omit if sensitive to spice)
  • 24 ounces spaghetti sauce
  • 1 cup cottage or ricotta cheese

  1. To cook the lentils: In a large saucepan over medium heat, warm the olive oil until shimmering. Add the onion and salt. Cook, stirring occasionally, until the onion is turning translucent, about 4 to 5 minutes. Add the garlic and cook until fragrant, about 30 seconds. Add the lentils and water, and stir to combine.
  2. Raise the heat to high and bring the mixture to a simmer, then reduce heat to medium-low and gently simmer until the lentils are tender and cooked through, about 30 to 40 minutes. Drain the mixture well in a fine-mesh sieve and return the lentils to their pot. Set aside.
  3. Meanwhile, preheat the oven to 350 degrees Fahrenheit and bring a large pot of water to boil. Cook the pasta just until al dente, according to package directions. Drain and return the pasta to the pot. (if using gluten-free pasta under-cook the pasta. It will continue to cook in the oven)
  4. Add the lentils to the pasta. Add ½ cup of the cheese, reserving the rest for later. Season to taste with salt, freshly ground black pepper, and red pepper flakes (if using).
  5. Pour 1 cup of the marinara sauce into a 13x9-inch baking dish. Spread the sauce around with a spatula so the base of the baker is evenly coated. Pour the lentil and pasta mixture into the baker and spread it so it’s evenly distributed. Using a spoon, dollop cottage or ricotta cheese in big spoonfuls over the pasta, then just lightly swirl the mixture a bit so the cottage cheese is still concentrated in those areas.
  6. Drizzle the rest of the sauce evenly over the dish (adding extra sauce if you’d like) and gently spread it over the pasta. Sprinkle the remaining mozzarella evenly over the dish. Cover the baker tightly with aluminum foil—don’t let it touch the cheese—or stick a few wooden toothpicks down the center and place a generously sized piece of parchment paper, folded in the middle to make a “tent” over the baker.
  7. Bake for 30 minutes, then remove the covering, increase the heat to 450, and continue baking until the cheese on top is golden and spotty, 3 to 9 more minutes. Remove from the oven and let it cool for 10 minutes before serving.

Three Bean Slow Cooker Chili


We've been experiencing a very wet and cold winter here in SoCal. So, I've been breaking out all my favorite winter recipes lately. One thing I love to make on a cold miserable day is chili. I don't know why those two things go together but they do. It's kind of like being sick and having soup. However, chili takes a lot of time to make, and depending on the style of chili you make, it can also be time consuming to prep. If you haven't noticed by now, I'm a lazy cook. I don't like to spend a ton of time in the kitchen slaving away. Which is why this slow cooker chili is my favorite. It's bursting with flavor, takes minimal time to prep, and the slow cooker does all the cooking for you.


I usually always make my chili in the slow cooker just because chili needs to simmer low and slow for some hours in order to really develop flavor. I don't know about you, but I don't hours to spend stirring a pot of chili making sure it doesn't burn or bubble over. I can put it all in the slow cooker and go to work, run errands, clean the house, read a book, binge watch my favorite shows and not have to worry about dinner. I love it! I used to soak and cook my beans before putting them in the slow cooker but I've recently discovered that you don't have to do that. You just have to rinse the beans to clean them, and then you just pour them in the slow cooker with your ingredients and extra broth to cook them. Making chili has never been easier than this. Now, I don't eat meat so this is for a vegetarian three bean chili. However, if you would like meat, I would brown a pound of ground beef and add it to the rest of the ingredients already listed.


  • 1 large carrot (about 2 cups), peeled and grated
  • 1 large zucchini (about 1 cup), grated
  • 1 bell pepper, chopped
  • 1 (14 oz) can diced tomatoes
  • 2 c. dried kidney beans
  • 1 c. dried black beans
  • 1/2 c. dried garbanzo beans
  • 1.5 c. frozen corn
  • 2 Tbsp. hot sauce
  • 1 packet low-sodium chili seasoning mix
  • 7 c. vegetable broth

  1. Rinse beans and make sure there are no rocks or debris mixed in.
  2. Add all the ingredients into your slow cooker and cook on high for at least 8 hours or until the beans are tender and the flavor has come together. 
  3. Top chili with toppings of choice (shredded cheddar cheese, avocado slices, chopped onion, or corn chips)

Tamale Pie


One of my favorite dishes that I make probably at least once a month is this tamale pie. Since I gave up meat some time ago, I haven't really been able to find and therefor eat a traditional tamale, and let's be honest, tamale making is no joke. It's definitely not something I'd want to do since I tend to be pretty lazy when it comes to cooking. So, when I saw a recipe that converted the tamale into a skillet bake, I knew I had to give it a shot.


The recipes I was finding online all had meat products in them and even though vegetables aren't normally in tamales, I wanted to incorporate more sustenance. So, I did some tweaking and kind of made my own tamale pie. One thing that I love about this dish is that it's so easy to make and yet it's bursting with flavor. It's also versatile and ingredients can be swapped out. For instance, if you don't want beans and in fact want meat, then use a pound of meat of your choosing. If you don't like bell peppers and instead want to use mushrooms, or omit all vegetables from the dish, you can do that, too. Like I said, I make this dish just about once a month and every month I made it a little different depending on what I have on hand. Sometimes I use plain diced tomatoes (not as flavorful as the tomatoes with chilies in them), sometimes I add a diced jalapeno, sometimes I've even added a mixture of beans because I didn't have enough of one kind on hand. You can also change the ratio of toppings as well, as long as the cornbread base stays the same, the ingredients you put on top can be changed around to your liking.


  • 2/3 cup flour
  • 1/2 cup yellow cornmeal
  • 3 Tbsp. sugar
  • 1 Tbsp. baking powder
  • 1/4 tsp. salt
  • 1 egg
  • 1/4 cup plain fat-free yogurt (sour cream also works)
  • 1 cup corn, thawed if frozen and if canned be sure to drain and rinse the corn
  • 1 (10 oz) can Rotel diced tomato with chilies (I use habaneo but they have other varieties)
  • 1 (10 oz) can red enchilada sauce
  • 1 onion, chopped
  • 1 bell pepper, chopped
  • 2 tsp. cumin
  • 1 Tbsp. chili powder
  • 3 cups cooked pinto beans (or 2 cans of pinto beans, rinsed and drained)
  • 2 cups cheddar cheese
  • 1/2 cup salsa


  1. Preheat oven to 400° F
  2. Mix the first nine ingredients (from flour to diced tomatoes) and pour into a 14 in round skillet or cast iron pan. Bake for 20 minutes and remove from heat.
  3. Meanwhile, saute the onion and bell pepper, add the cumin and chili powder, and saute for another minute.
  4. Stir in cooked beans and cook until vegetables start to get tender. Mix in the salsa and removed from the heat.
  5. Poke holes in cornbread with a fork and pour the enchilada sauce over the top.
  6. Pour bean mixture on top of the cornbread and spread it out to evenly cover the cornbread.
  7. Top with cheese and bake for 20 minutes. Serve hot.

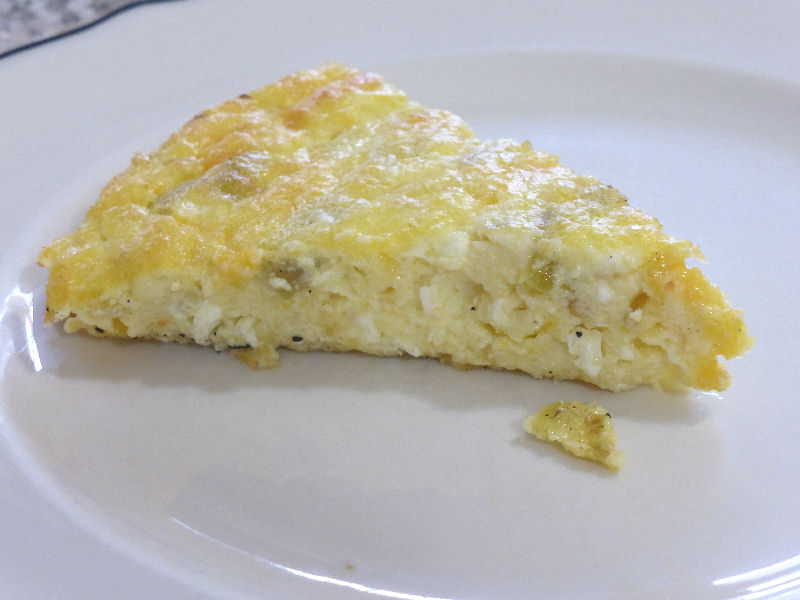
Cheddar and Chile Egg Casserole

 
So, you may remember me saying something about us moving recently. Well, on our first day, as we were moving in our stuff from the moving truck, our neighbor came over to introduce herself. She even invited me over for a brunch she was having with some of the other neighbors and thought it would be a great way for me to meet them. I was kind of nervous and excited to meet everyone. I didn't need to be because they were all super nice. One of the dishes my neighbor made for the brunch was this green chile egg casserole. I'm not a huge fan of eggs. I can stomach an egg sandwich, even a hard-boiled egg, but I just can't handle omelets. It's just too eggy for me. So, I cautiously took a small piece of the casserole, so as to not be rude, and wound up trying to not shovel it all in my mouth as quickly as possible. It was so light and airy. It practically melted in my mouth and I found myself clamoring for the recipe. I'm so glad I found it online because this is definitely a must for when we have company spend the night.


When I saw there was cottage cheese in the dish I was in denial. I didn't remember there being white chunks in my egg at the party. The flour also threw me for a loop. However, trust me, it will all work out. The cottage cheese adds that fluffiness to the casserole while keeping it super moist. I used low-fat cottage cheese but whatever you prefer will work. This is essentially something you can make the night before, store it in a airtight container or bag, and then the morning of just give it a good whisking to whip it all up before popping it into the over.


recipe adapted from Rachael Ray

  • 3 TBSP butter/margarine, melted 
  • 5 large eggs, beaten 
  • 1 cup cottage cheese 
  • 1/2 cup shredded cheddar cheese 
  • 1 (4 ounce) can diced green chilies 
  • 1/4 cup flour 
  • 1/2 tsp baking powder 
  • 1/2 tsp salt

  1. Preheat the oven to 350 degrees . Brush an 8-inch square baking dish with 1 tablespoon butter and set aside.
  2. In a medium bowl, whisk together the eggs, cottage cheese, cheddar cheese, chiles, flour, baking powder, salt and the remaining 2 tablespoons butter. Pour into the prepared dish and bake until set, about 35 minutes.


Healthier Spinach Artichoke Dip


Every weekend the Mister and I make a dip to enjoy while we watch movies, catch up on our favorite shows, or play games. I usually make your typical cream cheese salsa dip, but I've found myself wanting to try other dips. I'm one of those people that can't have the same thing too often, otherwise I get bored with it. So, I decided to look around online to see what interesting dips there were out there. Now, I know what you're thinking, "Kristin, spinach artichoke dip isn't anything new." While you would be correct, the dip is sort of new for me. You see, way back when, like eleven and a half years ago, I was a new bride trying to figure out how to cook. I had seen a recipe for spinach artichoke dip, probably on the Food Network channel and decided to make it. BIG mistake. HUGE! I remember that the dip consisted of a lot of mayonnaise, not something I usually ate because I was a Miracle Whip kinda girl. Come to think of it, considering the jar of mayo I put in the dip... it was probably a Paula Dean recipe. Anyway, while I was slightly grossed out by the mayo ratio in the dip, I had high hopes that I was going to impress my husband with the most fabulous, luxurious appetizer I've ever made. Fast forward an hour or two and The Mister came home from work to find all the window open, the oven turned off with the dip still inside, and me locked into our bedroom, nauseated from the smell. Needless to say, the dip went right into the trash and I spent the night curled up in the fetal position chomping on Tums. Ever since then, I've steered clear of anything resembling this dish... until now.


Now one thing that sets this one apart from that disastrous dip many moons ago is that this one doesn't have any mayo. None. Zero. Zilch. In fact, the creamy white base is yogurt and cream cheese... two things that I love. Two things that when they are heated up, do not make me nauseous. Now, as you see in the pictures, this recipe make a LOT of dip. It's insanely delicious and you will have no problem eating it all. However, if you made a New Years resolution that doesn't jive with eating a whole thing of dip, maybe invite some friends over. I served my dip with sliced bread but you could make this even healthier by slicing one of those huge carrots you see at the grocery into thick strips, and also eating it with celery.


  • 8 oz reduced fat cream cheese
  • 16 oz (2 cups) plain, non-fat yogurt
  • 2 Tbsp margarine (or butter)
  • 1 1/2 cups parmesan cheese*
  • 14 oz artichoke hearts (not the marinated ones) , drained and coarsely chopped
  • 1 japapeno, diced (remove the insides and seeds of jalapeno if you don't like spice)
  • 10 oz frozen spinach (thawed and drained)
  • 2-3 garlic cloves, minced

  1. In a medium pot over medium heat, melt together cream cheese, yogurt, margarine and parmesan cheese, uncovered, stirring frequently until melted and an even consistency. It should start to bubble lightly.
  2. Stir in coarsely chopped artichoke hearts, jalapeños, and drained spinach. Finally, stir garlic cloves. Let it bubble for a few minutes and it's done.

*if you are a vegetarian, look for a vegetarian parmesan cheese. 

Cannoli Cheese Ball


:GASP: I know. I know. This is the first cannoli related recipe on my site. While I like cannoli, I don't necessarily want to make them. It's just a lot of work and I'd honestly just rather buy one from a bakery. However, when I came across this super easy cannoli cheese ball I knew I had to give it a shot.


When I say super easy, I mean it. You pretty much just mix everything together, create a ball using plastic wrap, let it chill in the refrigerator while you clean up your mess, and then roll the ball in chocolate chips. That's it! Easy peasy, and it's so good. It's obviously on the sweet side but would be oh so perfect for a party. ;)


recipe adapted from Taste & Tell

  • 8 oz cream cheese, at room temperature
  • ½ cup ricotta cheese
  • ½ cup powdered sugar
  • 1 teaspoon cinnamon
  • 1¾ cups mini chocolate chips, divided
  • Vanilla Wafers or graham crackers, for serving
  1. In a medium bowl, beat the cream cheese until smooth. Add the ricotta, powdered sugar and cinnamon and beat until combined. Stir in 1 cup of the chocolate chips.
  2. Dump the mixture out onto a piece of plastic wrap. Gather the plastic wrap around the top, squishing the mixture into a ball shape. Refrigerate for at least 1 hour.
  3. Place the remaining ¾ cup of chocolate chips on a plate or in a shallow dish. Open the plastic wrap and turn the cheeseball filling onto the chocolate chips. Use your hands to roll the ball to coat in the chocolate chips.
  4. Serve with vanilla wafers and graham crackers.


Sweet Potato Caribbean Curry


Usually when I make curry, it's an Indian curry. However, when I came across this recipe I had to know what a Caribbean curry was. I liked that all the ingredient were items that I either had on hand, or would find a use for down the road. I hate it when a recipe calls for some fancy ingredient that you only use one. Like the saffron that's been sitting in my cabinet for 4 years now. >.<


One thing I loved about this curry is that you serve it over polenta. I usually serve my curry over rice and had thought to do so with this but changed my mind and decided to make polenta instead. I'm so glad I did because the polenta definitely adds an extra layer to this curry that you wouldn't have gotten with rice. Plus, depending on your tastes, you can doctor the polenta up with curry spices, hot sauce, or mix in some herbs to give it more flavor. Definitely make your own polenta versus buying that pre-made stuff in the grocery store. It's really easy to make and like I said, you can modify it and add spices and seasonings to bring a whole new level to this curry dish.

recipe adapted from Connoisseurus Veg

  • 1 tbsp vegetable oil
  • 1 onion, diced
  • 3 garlic cloves, minced
  • 1 tbsp. freshly grated ginger
  • 1 jalapeno pepper, seeded and finely chopped
  • 1 (14 oz) can light coconut milk
  • 1 medium sweet potato (about 1 pound), diced
  • 1/2 tsp. ground cumin
  • 1/2 tsp. ground coriander
  • 1/2 tsp. ground turmeric
  • 1/4 tsp. dried thyme
  • 1/4 tsp. allspice
  • 1/4 tsp. black pepper
  • 1/8 tsp. ground cinnamon
  • cayenne pepper to taste
  • 1 (14 oz.) can chickpeas, drained and rinsed
  • 1 cup frozen peas, thawed
  • salt to taste
  • creamy polenta or cooked rice
  • lime wedges (garnish)
  • fresh cilantro (garnish)
  • chopped scallions (garnish)

  1. Coat the bottom of a medium saucepan with oil and place over medium heat. Add onion and cook until softened and translucent. Add garlic and ginger. Cook 1 minute more, until very fragrant.
  2. Add coconut milk, sweet potato, cumin, coriander, turmeric, thyme, allspice, pepper, cinnamon, jalapeno, and cayenne. Stir a few times, raise heat and bring to a simmer. Lower heat and allow to cook until sweet potatoes are tender, about 20 minutes. Stir in chickpeas and peas. Allow to cook just until heated throughout, 1-2 minutes more. Season with salt to taste.
  3. Divide rice or polenta onto plates and top with curry. Sprinkle with cilantro and scallions, then season with a squeeze of lime juice, to taste.


Polenta recipe
  • 4 cups water 
  • 1 teaspoon salt 
  • 1 cup yellow cornmeal (not cornbread mix) 
  • 1-3 tablespoons butter/margarine

  1. Bring the water to a boil. Bring the water to a brisk boil over medium-high heat. Add the salt.
  2. Pour the polenta into the boiling water. While whisking gently, pour the polenta into the boiling water in a steady stream.
  3. Continue whisking until polenta is thickened. Turn down the heat to low and continue whisking until the polenta has thickened enough that it doesn't settle back on the bottom of the pan when you stop stirring.
  4. Cook the polenta 30-40 minutes. Cover the polenta and continue cooking. Stir vigorously every 10 minutes or so, making sure to scrape the sides, bottom, and corners of the pan. Cook 30 minutes for softer porridge-like polenta or 40 minutes for thicker polenta.
  5. Stir in butter. Stir the cheese and butter into the polenta, if using. Serve immediately.

Butternut Squash Arborio with Mushrooms


So it dropped down into the 70's for a week here, and I quickly pulled out my fall recipes to take advantage of the cool weather before it heated back up again. One of the recipes that I've been dying to try is this one. I love that it's an all-in-one skillet meal and that it features butternut squash. It's been a long time since I made arborio or risotto. I just never think of it as a full meal and now that I don't eat meat anymore I find it hard to find something to pair it with that would go with it. However, with the squash and the butternut squash, I thought this made a delicious dinner. It had a lot of flavor and different textures that I didn't feel like I was eating just a bowl of flavored rice. However, if you want to have something with this dish, chicken or salmon would be perfect. I actually warmed up some of the leftovers and broiled a piece of salmon to go with it and it was delicious.


This dish was easy to make and easy to clean up (which I love). If you wanted to shave some time off of making this dish you can always used pre-peeled and chopped squash from your grocery store. However, you will be saving a lot more money if you just buy a whole squash and do it yourself. Sure, it takes a little more time and effort but you can do it all ahead of time, and store it in the refrigerator until you're ready to make dinner. I wouldn't use the frozen squash though. I tried recreating this dish with the frozen squash I had on hand and the butternut squash pretty much disintegrated into the rice.

recipe adapted from Savory Tooth

  • 1 cup risotto rice or arborio rice
  • 1 pound butternut squash, peeled and diced into 1/2-inch chunks
  • 10 ounces mushrooms, sliced
  • 3 cups vegetable stock
  • 5 garlic cloves
  • 2 Tbsp olive oil
  • 2 Tbsp butter
  • 1/2 tsp salt
  • 1/4 tsp pepper
  •  Parmesan* or Asiago cheese, finely grated, for garnish (optional)

  1. Heat olive oil in a large 5-quart nonstick sauté pan over medium heat. Add butternut squash, salt, and pepper. Cook for 15 minutes, stirring occasionally. Use a pan sufficiently large so that the butternut squash chunks sit in a single layer on the pan.
  2. Add mushrooms and garlic to the pan, sautéing for a few minutes.
  3. Add rice and vegetable stock. Mix everything together. Bring to a boil and then decrease to a simmer. Cover the pan with a lid and simmer on medium-low heat for 30 minutes. Uncover the pan and check that the rice is tender and done. Simmer with the pan uncovered for a few minutes to evaporate any excess liquid.
  4. Add butter to the pan and stir as it melts. Serve immediately and optionally garnish with finely grated cheese.

* Parmesan cheese is made with animal rennet. However, there are some brands that do not use animal rennet in their cheese. If this is a concern for you, be sure to check the ingredients of the cheese to ensure that animal rennet is not listed.


Curried Quinoa Stuffed Acorn Squash


One of my favorite things about fall is all the squash recipes I can make. I'm a big fan of butternut squash and pumpkin, but I love acorn squash. It's perfect because you don't really have to do anything to it. You cut it in half, rub some oil on it, and bake it in the oven until it's soft. I've had it baked with brown sugar and butter for a sweet treat, and I've had it a couple different savory ways like this. I think the whole bowl aspect is my favorite because it's just so darn awesome looking. This is by far my favorite acorn squash bowl because it mixes two of my favorite things, curried quinoa and the squash. It also reminds me of the spiced quinoa that I make just about once a month in the cooler months. So, I suppose, this is kind of a more spruced up version of that.

While this isn't a quick meal, it is super easy to make. The most time consuming part is waiting for the squash to roast. Now, I've read recipes that say you can microwave your squash to cook it, I have never done that. Not only do I find that the cooking of things in the microwave are inconsistent and some areas get cooked more than others, but things tend to get a bit gummy and chewy after they've been nuked. So, I prefer the traditional method of roasting them in the oven. It's not so bad though because while the squash is roasting, you can work on the quinoa, clean up the kitchen, and kick your feet up for a bit before you have to start assembling them. I suppose you could always roast the squash ahead of time and then on the day of, make the quinoa and assemble the dish. That would cut down your time by 40 minutes. Although, I would pop the squash in the oven for the time the quinoa is cooking, otherwise the squash will be cold, and trust me, you want the squash to be hot for this dish. ;)


Recipe adapted from Well Floured

  • 2 acorn squash, medium size, cut in half, seeds and pulp removed
  • 3 Tbsp olive oil divided
  • 1 small onion, diced
  • 1/4 cup chopped apple
  • 1 cup of quinoa, I used rainbow
  • 1 Tbsp curry powder
  • 1 1/2 cup vegetable stock, water or chicken stock could also be used
  • salt and pepper to taste
  • 1/4 cup crumbled goat cheese or feta 

  1. Pre-heat the oven to 425°f
  2. Rub the inside of the squash with 1 Tbsp olive oil, season with salt and pepper
  3. Roast cut side up for 1 hour
  4. While the squash is roasting, heat the remaining olive oil in a saucepan over medium heat
  5. Add the onion and apple, and cook until they begin to soften, about 2 minutes
  6. Stir in quinoa, and cook until toasted, about 5 minutes
  7. Stir in the curry and the stock
  8. Cover,bring to a boil, and reduce the heat
  9.  Simmer until the liquid has been absorbed,about 15 minutes
  10. Remove from the heat and let site for 5 minutes
  11. Fluff with a fork, and divide the quinoa among the 4 squash halves
  12. Top with the cheese, if desired
  13. Serve immediately